


When you start Xcas, you will be presented with a window which looks like the following:
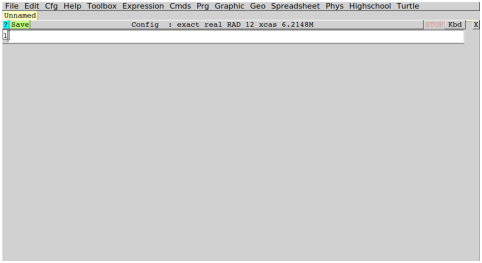
The menu items have submenus, and sometimes sub-submenus. When indicating a submenu item, it will be separated from the menu item with ▸; for example, you can save a session with File▸Save, which is the Save item in the File menu.
The menu bar contains the usual menus for graphic programs. It also contains all of the Xcas commands grouped by themes. For some commands, if you choose it from a menu then the command will be put on the command line. If the message window is open (which you can open with the Cfg▸Show▸msg menu item), a brief description of the command will appear in that window. For other commands, for example the Graphic commands, you will get a dialog box which lets you specify the arguments; afterwards, the command with the arguments will be placed on the command line.
The Help menu has links to the Help index, various manuals, as well as the online forum.
The Cfg menu has various items that allow you to configure various aspects of Xcas. This tutorial will refer to the Cfg▸Cas configuration and Cfg▸Graph configuration menu items. The Cfg▸Cas configuration menu item will bring up the same configuration page as clicking on the status bar. These items will bring up windows with various entry fields and check boxes; after you make any changes, you can click the Apply button to apply them and the Save button to save them for future sessions.
The Cfg▸Cas configuration menu item will bring up a window with options that determine how Xcas computes. This includes some things mentioned in this tutorial, such as:
The Cfg▸Graph configuration menu item will bring up a window with options that determine how Xcas draws graphs. This includes the default ranges for the axes; the x-axis will go from X- to X+, the y-axis will go from Y- to Y+ and the z-axis will go from Z- to Z+.
You can run a command by typing it into the command line and pressing Enter. If you want to enter more than one command on a line, you can separate them with semicolons. If you want to suppress the output of a command, you can end it with a colon-semicolon (:;).
If you have enough commands, there will be a scroll bar on the right which you can use to scroll through different command line levels. The Edit menu will allow you to merge levels, group levels and add comments.
All commands are kept in memory. You can scroll through previous commands with Ctrl+ arrow keys, and modify them if you want.